Microscale chemistry is, paradoxically, growing all the time.
This is the departure page for you to find a range of microscale chemistry activities. You will also find pages on how to make or purchase much. of the equipment used for microscale chemistry.
Big thanks should be given here to Bob Worley from CLEAPSS who has been preaching the Gospel of Microscale for many a year and who developed most of the activities listed here. (Though they have been adapted at SSERC to fit more easily into the Scottish Curriculum). His website can be found here (http://microchemuk.weebly.com/) and is well worth keeping an eye on.
In light of that, unlike the rest of our experimental resources, the microscale ones are accessible to logged in members only.

Here is a list, with hyperlinks, of the various microscale activities that can be found in this section along with a brief summary of each.
Ammonia Reactions – A series of drop-scale reactions carried out in a petri-dish, which, along with the small scale, makes it suitable to carry out in the open laboratory. (CfE level 3, N5)
Conductivity – Using a DIY conductivity meter to investigates conductivity of solutions. (CfE level 3, N5, H)
Cracking – The small-scale cracking of paraffin oil to produce a mixture of smaller alkanes. (N4)
Dehydrating alcohols – A very similar reaction to the cracking one above but this time alcohols are dehydrated (using the same method) to give alkenes)
Diffusing precipitates – Some simple, drop-scale experiments looking at the formation of precipitates as ions diffuse. (CfE level 3)
Diffusion of Gases – A few simple, colourful experiments showing the diffusion of gases, carried out in petri dishes – to protect the observer from harmful gases and the experiment from air currents. (CfE level 3&4, N4 & others)
Drop electrolysis – A series of micro-scale investigations into the electrolysis of different solutions. (CfE level 3, N5)
Electrode potentials – A small-scale, convenient method of investigation electrode potentials of metal pairs using overlapping strips of filter paper. (CfE level 3, N3, N4)
Electrolysis of lead bromide – A microscale version of the classic experiment to show that a molten ionic solid will conduct electricity. The small scale means it can be done in the open lab. (CfE level 3, N4, N5)
Enthalpy of Neutralisation – A microscale version of the experiment to investigate the amount of energy produced (as heat) in a neutralisation reaction (H)
Formula of magnesium oxide – Using a bottle-top crucible to carry out the oxidation of magnesium ribbon and re-weighing to determine the formula. (CfE level 3, N4)
Haber Process – A companion to the Ostwald process. A small scale demonstration of the reaction to make ammonia from nitrogen and hydrogen using an iron catalyst. (N4, N5)
Hoffman voltameter – Using a microscale Hoffman voltameter, made using syringes, to investigate the electrolysis of water. (CfE level 3, N3)
Indicators – Two experiments investigating indicators on the microscale. (CfE level 3, N3, N5, AH)
Ion migration – A microscale version of the classic experiment using copper chromate. Blue copper ions move towards the negative electrode and yellow chromate ions towards the positive. The whole thing is carried out in a Petri dish which protects the obnserver from ammonia fumes. (CfE 3 and beyond)
Iron Drops – A series of microscale reactions to show the chemistry of iron compounds carried out on a drop scale. (CfE level 3, AH)
Iron-sulphur – A small-scale reaction of iron and sulphur followed by investigation of the sulphide. The small scale approach means it does not need to be carried out in a fume cupboard. (CfE level 3, N4)
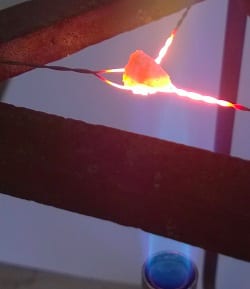
Marble chip – Using a bespoke nichrome wire holder to decompose the calcium carbonate in a marble chip and investigate the products formed. (CfE level 3, N4)
Microelectrolysis – Using carbon-fibre electrodes to electrolyse a solution of copper chloride and to further investigate the displacement reactions of the halogens. (CfE level 3, N3, H)
Nitrogen Dioxide reactions – A look at the chemistry of nitrogen dioxide. The gas is contained in a Petri dish, making it safe to carry out in the open lab.
Ostwald process – A companion to the Haber process. A mixture of ammonia and oxygen in a syringe is passed over a palladium catalyst (copper also works) and the resulting nitrogen dioxide gas turns universal indicator red. (N4, N5)
Photochemical catalysis – Using uv light and titanium dioxide to bleach methylene blue dye – a process with potential for water purification. (H, AH)
Polymerisation – A microscale polymerisation reaction, of methyl 2-methylpropenoate (methyl methacrylate) to make perspex. (N4, N5)
Reduction of Iron or copper oxide with carbon – Using a bottle-top crucible to reduce copper II oxide or Iron III oxide to copper or iron using carbon. CfE level 3, N3, N4, N5, Higher)
Reduction of copper oxide with hydrogen – Reducing copper II oxide to copper using hydrogen. The small scale eliminates the explosion hazards. CfE level 3, N3, N4, N5, Higher)
Thermit – A microscale version of this classic demonstration that can easily be done in the open lab. ((CfE level 3, N4, H)
Thiosulphate / acid reaction – microscale – A small-scale variation of the popular reaction for determining rates that reduces the production of toxic sulphur dioxide. (CfE level 3, N3, N4, N5, H)
Titration – A microscale version of a titration using a pasteur pipettes as a burette. The reaction can be followed either by counting the drops or by monitoring the change of mass on a balance. (CfE level 3, N5, H, AH)
Water in a hydrated salt – Using a bottle-top crucible and a spirit burner to determine the amount of water in hydrated salts. (CfE level 3, N4)
Zinc electroplating – A microscale version of the classic zinc electroplating experiment. (CfE level 3, N4)
One of the great advantages of the microscale approach, particularly in these cash-strapped times is the fact that it can be significantly less expensive than working at a normal scale.
Part of this is due to the fact that far less is used of any reagents, some of which can be expensive. But another saving is that many, even most, of the experiments can be carried out using cheap, sometimes home-made equipment rather than needing expensive (and fragile) laboratory glassware.
The pages linked to here, give information on the use and/or making of all sorts of pieces of equipment that will make your microscale chemistry more affordable.
Balances – An overview of inexpensive balances that are suitable for microscale chemistry use.
Conductivity tester – How to make and use a portable conductivity tester.
Heating – Methods of heating on a microscale. Including How to make a mini spirit burner and How to make a micro heating mantle
Reaction vessels – a look at suitable vessels for carrying out reactions in or on. Laminated sheets, Spotting tiles, vials/bottles, combiplates and crucibles
Supports – Devices for holding your reaction vessels in place. Including clamps, a mini tripod attachment for the spirit burner and a bespoke marble chip holder.
Titration – Methods for carrying out titration on a microscale using inexpensive equipment.
Microscale Hoffman Voltameter – How to maks a cheap voltameter for a few pounds.
Microscale chemistry really began in the 1980s with two main strands:
1. aimed at introducing practical work for schools in poorer countries where there might not be laboratories and chemicals/equipment are in short supply.
2. used in a few universities in the USA where significant educational advantages were found in working at this scale.
However, in Europe and America at least it remained a niche activity. Then, in the mid 2000s, green chemistry came on the scene in a big way and the green credentials of microscale gave it a new lease of life. It seems to us that while there will always be a place for large scale chemical work, microscale chemistry for schools in the UK is an idea whose time has come.
Microscale chemistry has many advantages.
Safer procedures
Microscale procedures are safer than the original demonstrations because of their size.
• The classic reduction of copper oxide by hydrogen had resulted in many serious accidents: the microscale version is safer because an explosive mixture of hydrogen and air cannot be made.
• Electrolysis reactions often produce toxic gases which affect asthmatics but dealing with volumes of less than 10 cm3 cause no serious issues.
• The cracking of alkanes can lead to explosions caused by the suck back of cold water into a hot glass test tube. With the microscale version, this cannot occur.
Reduces cost
Microscale equipment is mostly plastic and inexpensive. Balances weighing to 2 decimal places can be found for less than £10 and even 3 decimal places for not much more); and they are accurate. A full size Hofmann voltameter would cost over £150 the glass, the taps and the electrodes are easily broken: a microscale one can be made for less than £20. In addition, working on a micro scale means using smaller quantities of sometimes expensive chemicals.
Reduces waste
Dealing with waste is of great concern to all countries now. Using smaller amounts produces smaller amounts of waste. This in turn reduces time in preparation, clearing up and disposing of waste. The UK is lucky in having technicians do a lot of this work but if there is less of this to do then more time can be devoted to more constructive activities.
A laboratory is not always required
This is not always a desirable advantage but it can very useful at times for instance:
• when, due to timetabling, some chemistry lessons are scheduled in an oprdinary classroom
• carrying out procedures quoted in text books but said to be impossible to perform in the laboratory eg The Haber process for making ammonia from nitrogen and hydrogen and the Ostwald process for making nitric acid from ammonia and oxygen can be demonstrated in a few minutes. Even the hydrogenation of propene is possible.
Reduces practical times
If demonstrations and practical procedures take too long and have to shelved to the next lesson, continuity is lost and the subject can become disconnected, not understood and in the end boring. Also, less time spent on the mechanics of the experiment allows for more discussion and questioning
Better classroom control
Much of the time wasted in lessons is caused by students moving around the room to find sinks and balances and collecting chemicals and equipment. This can lead to poor behaviour but microscale activities can be carried out in a small area of the room. Another revolution is that as the quantity of liquid used is in the most 2 cm3, with practiced techniques, students can sit down to carry out the activity.
Easier for students to manage
Recent observations are that the use of microscale are easier to manage by the students.
Quantitative results and data manipulation are still possible
Despite the small scale and the generally inexpensive equipment, a lot of good results can be achieved by these methods, comparable in many cases with the full-scale approach. The combustion of magnesium to illustrate an increase in mass of combustion is traditionally carried out in a crucible but with often poor results. Using magnesium sandwiched between 2 bottle tops, held with nichrome wire produces excellent quantitative results in the space of 15 minutes for students.
Are there any problems?
The fact that it is on a very small scale does mean that there are issues with using this technique for demonstrations. It is possible to get around this though. Images can be projected onto a white board using a webcam or video microscope.
Another problem is that using very small quantities can raise problems with dexterity for some pupils. Like any other skill, however, this is one that can be improved with practice.


